
240SX Manual Transmission Swap⁚ A Comprehensive Guide
This guide details the process of converting your Nissan 240SX from an automatic to a manual transmission․ It covers parts selection, installation, wiring, and troubleshooting, providing a step-by-step approach for a successful swap․ Expect challenges, but with careful planning and execution, you can achieve a rewarding result․
Necessary Parts and Components
A successful 240SX manual transmission swap hinges on acquiring the correct parts; You’ll need a suitable manual transmission (S13 or S14 are common choices), considering compatibility with your engine (KA24DE or SR20DET)․ A flywheel and clutch kit matched to the chosen transmission are essential, ensuring proper engagement and power transfer․ The driveshaft will likely require modification or replacement to accommodate the new transmission’s length․ A manual transmission-specific wiring harness, often requiring adaptation or repinning, is crucial for proper ECU communication․ Don’t forget the pilot bushing for the input shaft, a new shifter and associated components, and a manual brake pedal assembly (or modification of the existing one)․
Transmission Selection⁚ S13 vs․ S14
Choosing between an S13 or S14 transmission for your 240SX manual swap involves careful consideration․ The S13 transmission, found in earlier 240SX models, is a readily available and often more affordable option․ However, it might necessitate the use of an S14 speed sensor for compatibility with certain ECUs․ The S14 transmission, from later models, offers potentially improved gear ratios and durability but might be more expensive to source․ Gear ratios are a key factor; research the specific ratios of each transmission to determine which best suits your driving style and performance goals․ Consider factors like availability in your area, budget, and desired performance characteristics when making your decision․ Both are viable options, but understanding their differences is vital for a successful swap․

Flywheel and Clutch Kit Installation
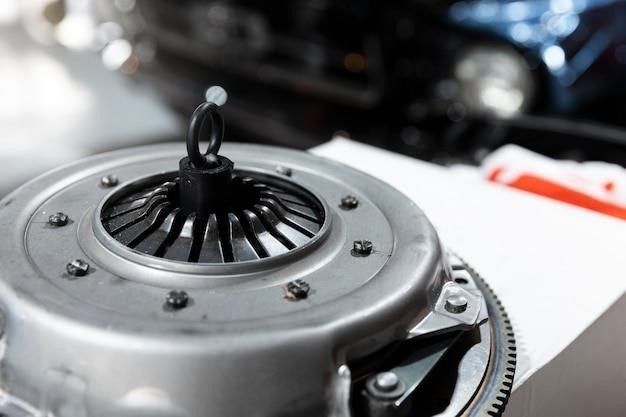
Installing the flywheel and clutch kit is a crucial step in your 240SX manual transmission swap, demanding precision and care․ Begin by carefully removing the automatic transmission’s flywheel, ensuring the crankshaft is clean and free from debris․ The new flywheel, specific to your chosen transmission (S13 or S14), must be installed accurately, paying close attention to alignment․ Next, install the clutch disc, pressure plate, and throw-out bearing, following the manufacturer’s instructions meticulously․ Torque specifications are critical; using a torque wrench is essential to prevent damage․ The pressure plate bolts must be tightened in a star pattern to ensure even clamping force․ After installation, double-check the clutch alignment and the throw-out bearing’s operation․ Proper installation ensures smooth engagement and prevents premature wear or failure of the clutch system․
Driveshaft Modification or Replacement
The driveshaft is a critical component connecting the transmission to the differential․ During a 240SX manual transmission swap, the existing automatic driveshaft is usually incompatible․ The length and possibly the yoke will differ between the automatic and manual transmission setups․ You might need a driveshaft from a manual 240SX, or you might need to have your existing driveshaft shortened or modified by a professional driveshaft shop․ Improper driveshaft length can cause vibrations, binding, or even catastrophic failure․ Precise measurements are crucial, and it’s recommended to have a professional measure and modify the driveshaft for optimal performance and safety․ Before reinstalling, inspect the driveshaft for any damage or wear․ Ensure the U-joints are properly lubricated and the slip yoke operates smoothly․ A correctly fitted and balanced driveshaft is essential for a smooth and reliable driving experience after your swap․
Wiring Harness and ECU Considerations
The automatic-to-manual transmission swap in a 240SX necessitates careful attention to the wiring harness and ECU (Engine Control Unit); The automatic transmission’s wiring is different from the manual transmission’s, requiring modifications or replacement․ You might need a manual transmission wiring harness from a donor car or a custom harness․ The ECU plays a crucial role in controlling various aspects of the vehicle, including the transmission․ Using the correct ECU for a manual transmission is vital․ The year of your 240SX matters significantly; using an ECU from an incompatible year can lead to issues․ For instance, a 1995 ECU might not work properly in a 1998 240SX․ Some individuals re-pin the ECU to match the manual transmission’s wiring, a task requiring specialized knowledge and tools․ Improper wiring can cause malfunctions, so carefully consult wiring diagrams and seek expert assistance if needed․ Ensure all connections are secure and correctly routed to avoid electrical problems․
Pilot Bushing and Shifter Installation
Installing the pilot bushing and shifter are crucial steps in your 240SX manual transmission swap․ The pilot bushing, a small cylindrical component, acts as a guide for the input shaft of the manual transmission, ensuring smooth engagement with the crankshaft․ Removing the automatic transmission’s pilot bushing is necessary before installing the manual transmission’s equivalent․ Different sized bushings exist, emphasizing the importance of using the correct part․ Improper installation can lead to transmission issues․ The shifter installation requires careful attention to detail․ You’ll need to mount the shifter mechanism securely and correctly adjust its linkage․ Some modifications might be needed to ensure proper alignment and shifting action․ Shortening the shifter rod is often mentioned, as is modifying or replacing the shifter mount․ The goal is a precise shift feel without binding or interference․ Consult detailed instructions and diagrams specific to your year and model of 240SX to avoid potential problems․ Test the shifter action thoroughly before completing the swap․
Brake Pedal Modification
During a 240SX manual transmission swap, brake pedal modification is often necessary․ Automatic and manual transmission models utilize different brake pedal assemblies․ The automatic’s pedal is typically longer to accommodate the automatic transmission’s linkage․ Direct replacement with a manual transmission pedal assembly is the most straightforward approach, ensuring correct travel and feel․ However, this often requires replacing the entire brake pedal assembly, which can involve additional work․ A more cost-effective alternative involves modifying the existing automatic brake pedal․ This may involve cutting and shaping the pedal to reduce its length․ Precision is crucial to maintain proper brake function and avoid compromising safety․ Use appropriate tools such as a grinder or Dremel to carefully modify the pedal, ensuring a smooth, even surface and the correct height for comfortable braking․ Remember to also consider the brake light switch integration, as it may require adjustments or replacement depending on your chosen method․ Testing the brakes thoroughly after modification is essential to confirm proper function and safe operation․
Transmission Mounting and Alignment
Precise mounting and alignment of the manual transmission are critical for proper operation and longevity․ The process involves securely fastening the transmission to its designated mounting points using the correct hardware․ This often includes a transmission mount and associated brackets, which may require modification or replacement depending on the specific transmission and year of your 240SX․ Incorrect mounting can lead to vibrations, misalignment of the driveshaft, and potential damage to the transmission and other drivetrain components․ Before tightening the mounting bolts, ensure the transmission is correctly aligned with the engine’s bell housing․ This might involve careful positioning and minor adjustments to achieve a smooth, flush connection․ Use appropriate shims or spacers if necessary to correct any misalignment․ Once aligned, carefully tighten all mounting bolts to the manufacturer’s specified torque․ Double-check your work to ensure the transmission is securely mounted and properly aligned․ A poorly aligned transmission can lead to premature wear and tear, noise, and ultimately, transmission failure․ Take your time and ensure a perfect fit for optimal performance and reliability․
Fluid Filling and System Bleed
After the transmission installation, filling it with the correct type and amount of fluid is crucial․ Consult your vehicle’s manual or the transmission manufacturer’s specifications to determine the precise fluid type and capacity․ Using the wrong fluid can severely damage the transmission․ Fill the transmission to the recommended level, checking frequently to avoid overfilling; Overfilling can cause excessive pressure and damage internal components․ Once filled, bleeding the system is essential to remove any air trapped within․ This process varies depending on the specific transmission; some may have bleeder screws, while others require a specific procedure․ Air in the system can impede proper shifting and clutch operation, leading to issues such as difficulty engaging gears or slipping; If your transmission has a bleeder screw, carefully open it while someone else slowly adds fluid, ensuring a constant flow without introducing more air․ For transmissions without bleeder screws, carefully follow the manufacturer’s instructions, which may involve cycling the gears while checking the fluid level․ Thorough bleeding guarantees smooth shifting and prevents premature wear and tear on internal components․ Always double-check your fluid level after bleeding․
Testing and Final Adjustments
With the 240SX’s manual transmission swap complete, thorough testing is paramount․ Start with a careful inspection of all connections and components, ensuring everything is securely fastened and properly aligned․ Begin the engine and listen for any unusual noises, which could indicate a problem with the transmission, clutch, or related components․ Check for fluid leaks around the transmission and clutch housing․ Next, engage each gear, moving smoothly through the range; any resistance or grinding signifies potential issues requiring further investigation․ Pay close attention to clutch engagement; it should be smooth and responsive without any slippage․ Test the vehicle on a safe, open area at low speeds, gradually increasing speed to check for any issues at higher RPMs․ Evaluate shifting smoothness and clutch performance․ If any problems occur, carefully re-examine the installation process to identify the source of the problem․ Fine-tuning may be necessary to achieve optimal performance; shifter linkage adjustments might be required to improve the feel and precision of shifting․ After the test drive, re-check fluid levels and for any leaks․ Addressing any issues promptly will ensure longevity and optimal performance of your newly installed manual transmission․
Troubleshooting Common Issues
During a 240SX manual transmission swap, several issues might arise․ Grinding gears often points to incorrect clutch adjustment or a damaged synchronizer․ A noisy transmission could indicate worn bearings or improper gear mesh․ Clutch slippage, manifesting as a lack of acceleration despite high engine RPM, usually means a worn clutch disc or improper hydraulic system pressure․ Difficulty shifting might stem from binding linkages or a misaligned shifter․ Leaks around the transmission indicate a seal failure or improperly tightened bolts․ If the engine cranks but won’t start, check the clutch safety switch wiring․ Remember to consult a workshop manual specific to your 240SX model and year for detailed diagrams and specifications․ Before attempting any repairs, ensure the vehicle is safely secured and the engine is off․ If you are not comfortable performing the repairs yourself, seek professional help from a qualified mechanic experienced with Nissan 240SX manual transmission swaps to avoid further damage․ Proper diagnosis is key to effective troubleshooting; systematically checking components will help pinpoint the problem’s source․ Accurate diagnosis will lead to successful repair and a smooth-shifting manual transmission․
Resources and Further Information
For detailed technical information and diagrams, consult a Nissan 240SX factory service manual specific to your vehicle’s year and model․ Online forums such as 240SX forums and Zilvia․net offer invaluable resources, providing access to experienced enthusiasts who can share their knowledge and troubleshooting advice․ YouTube channels dedicated to automotive repair frequently feature videos documenting 240SX manual transmission swaps, offering visual guidance on various aspects of the process․ Remember to cross-reference information from multiple sources to ensure accuracy․ When sourcing parts, reputable online retailers specializing in Japanese domestic market (JDM) parts often offer a wider selection of components․ Local auto parts stores can also provide necessary consumables like fluids and gaskets․ Always verify part compatibility with your specific 240SX model before purchasing․ Remember that safety should be your top priority; if you lack experience with automotive repairs, consider seeking professional assistance from a qualified mechanic․ A successful swap requires careful planning, attention to detail, and access to reliable information․